Bioactive Vivariums are always changing and evolving
Keeping vivariums and dart frogs is an evolving hobby with many unexpected iterations and changes. Each vivarium has a story to tell and here is the one of a 18x18x24 vivarium I picked up for $50 on Facebook market place in 2023. What started out as a home for a trio of Ranitomeya sirensis morphed into a more minimalistic hope for a breeding pair of Oophaga histrionica ‘Small form red heads’. Throughout the short period of 2 years this vivarium had many different iterations fueled by my frogs behavior and plant growth.
The Original Plan
My goal with this vivarium was to house a breeding trio of Ranitomeya sirensis ‘Highland’ in 2023. I previously had experience with Ranitomeya imitators ‘Chazuta’ as my first frogs and wanted to give the species another go. Luckily, I documented much of the progress of this vivarium on my Instagram and am able to recollect the different phases of this vivarium.
The Build – Converting an Exo-Terra into a dart frog vivarium
I typically use converted Exo-Terras because they are the most affordable option. Finding cheap exo-terras and vivariums is a hobby in itself for me. Like most people searching for a deal, I am constantly hunting on Facebook marketplace and can hardly resist a good deal.
In my Midwest experience, usually you can get 18x18x24 vivariums for around $50-100 dollars. However, if you check frequently enough sometimes you can get some killer deals. I ended up getting two 18x18x24 Exo-Terras for only $75.
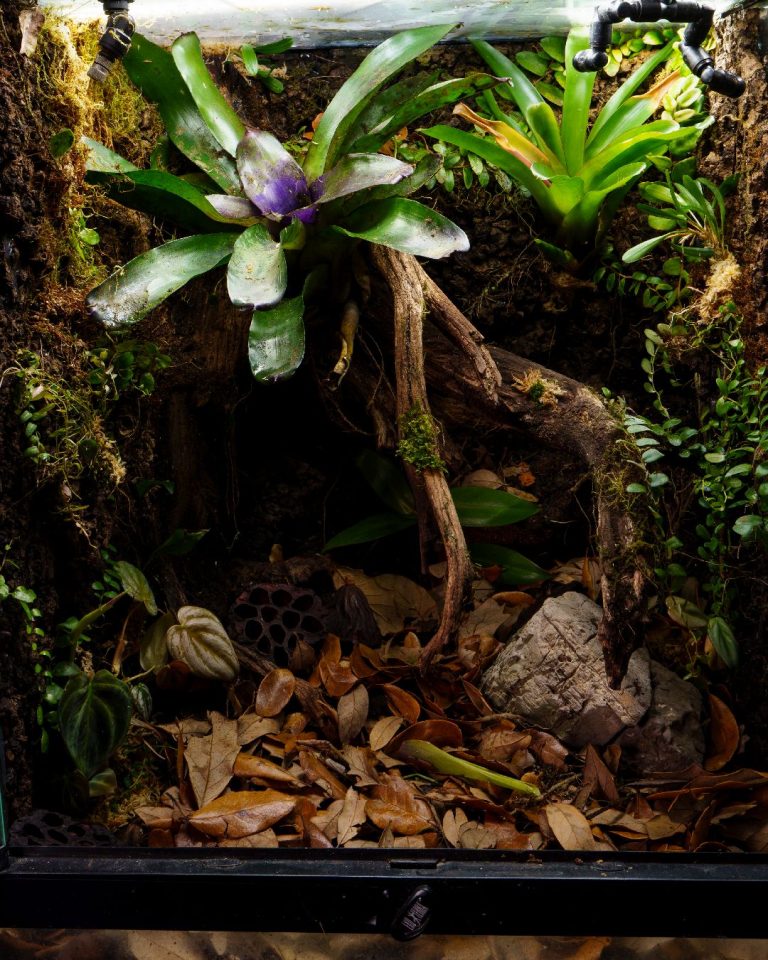
My goal was to make a budget build and get some more experience with filter foam as a substrate. The vivarium itself is a converted 18x18x24 exoterra with a drilled glass top with stainless steel mesh. I made this vivarium before I 3d printed vents or drilled drain holes in my vivariums, two things I will always do in all my future vivariums. The substrate is made out of filter foam with fluval stratum and horticultural charcoal to supplement it.
The walls were adorned with compressed cork panels silicone straight to the glass and carved with a screwdriver similar to the way @abunchoftanks on Instagram makes his vivariums. I find that layering cork to make little cliffs and valleys and smoothing it all out with carving makes it look more natural. I was also hopeful these crevices would provide hiding spots for the frogs and give them more surface area to hop around.
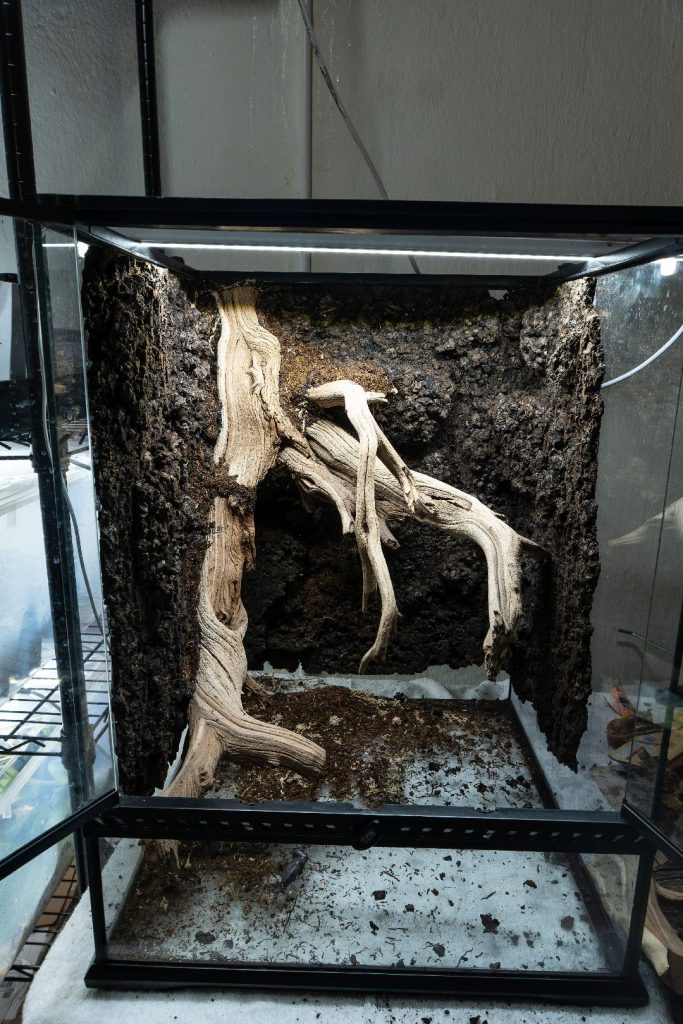
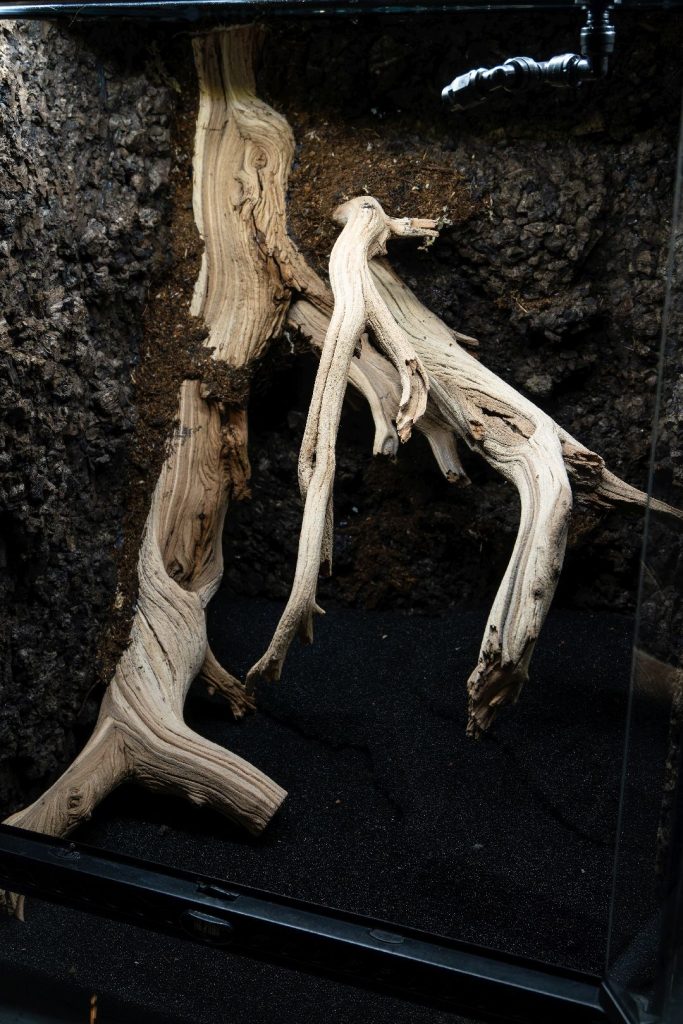
The hard scape consists of ghost wood sourced from Mike at Glass Box Tropical (my go to source for wood). I secured the pieces of wood in place with black great stuff foam and silicone. I then blended in the black spray foam by carving it and covering it in a mix of tree fern fiber, coconut coir and milled sphagnum moss.
Part 1. Building a vivarium for Ranitomeya sirensis
Like I said I built this vivarium with Ranitomeya sirensis ‘Highland’ in mind. My thought process was that the branches would provide lots of area for them to hop from brom to brom. I planted it heavily and provided a thick canopy for the frogs to dart around. This is a style I have moved away from for most of my vivariums now. Now I opt for slower growing smaller vivarium plants with a few key accent aroids.
I had heard these frogs were pretty shy, but I was shocked at how little I actually saw them. In the first 6 months, it was honestly an event if I was able to spot one. Forget about photographing them. Other hobbyists claim these frogs are fairly bold and even see them daily!
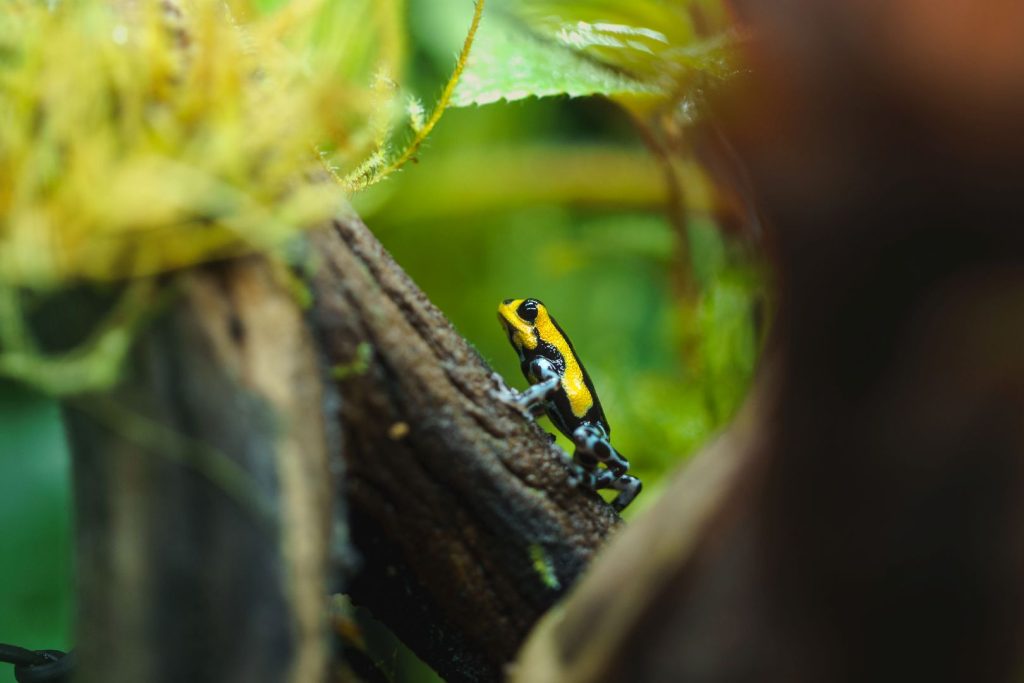
I will say once they started breeding they established their spots where they would hangout. Here I could see the male and a couple females every morning and late at night sleeping. Unfortunately, the male sat in the top left of the vivarium usually obscured by the giant bromeliad in the corner.
Additionally, it seems like R. sirensis ‘Highland’ can be kept in dense groups, but the dominant male will be mainly calling and breeding with females. I was shocked to see that I had a few male frogs in this vivarium but only heard 1 calling. Same goes for my grow out bins where I would only hear 1 male calling at any point. These frogs seemed more crepuscular and called in the very early morning and were the most active around sunrise.
Part 2. Overgrown jungle
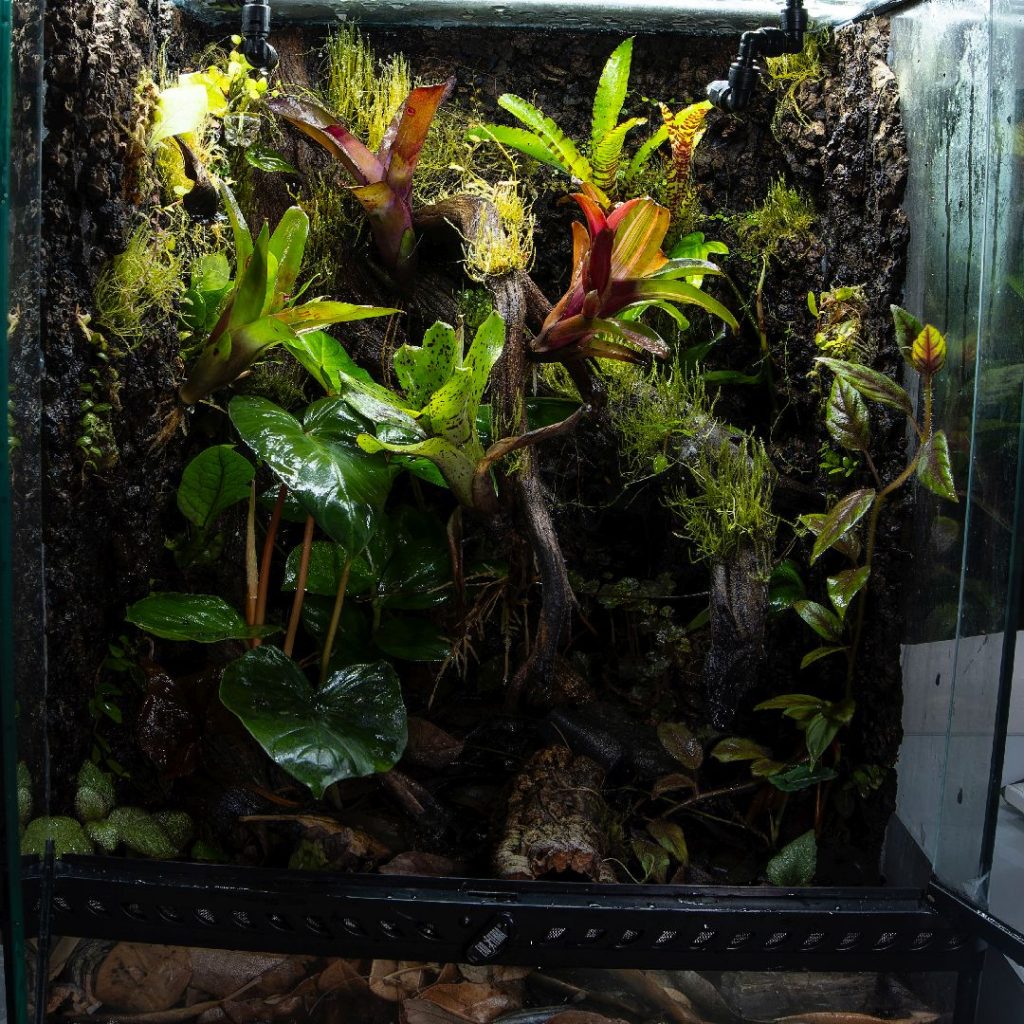
After planting and introducing the frogs I took a hands off approach in an attempt to make the frogs more comfortable. For some shyer frogs I noticed a tank with thick growth allows the frogs to be more comfortable. On the other hand there are more hiding spots so it is harder to see them. Regardless I just let the plants take over. This group was very prolific and laid in every setting I had them in, whether it be a temporary bin or in a freshly set up vivarium.
The vivarium basically stayed like this for the majority of its life. I would go in and trim occasionally when plants reached the top of the vivarium. Additionally, I took out some broms to curb some of the laying and keep track of eggs. I always considered selling these frogs as they were always so reclusive for me.
Conveniently enough I decided to vend at National Frog Fest and prepared my R. sirensis for eviction! Initially, I believed I had 3 R. sirensis in my grow out bins as well as 3 in my display vivarium. However, once I got back I heard calling from their suposedly empty vivariums. Turns out I had 2 more hiding even after I tore apart and moved all the leaf litter around. Luckily, I was able to sell them quickly and was done with ranitomeya (or so I thought).
Part 3. Reforestation, planting the 18x18x24 vivarium
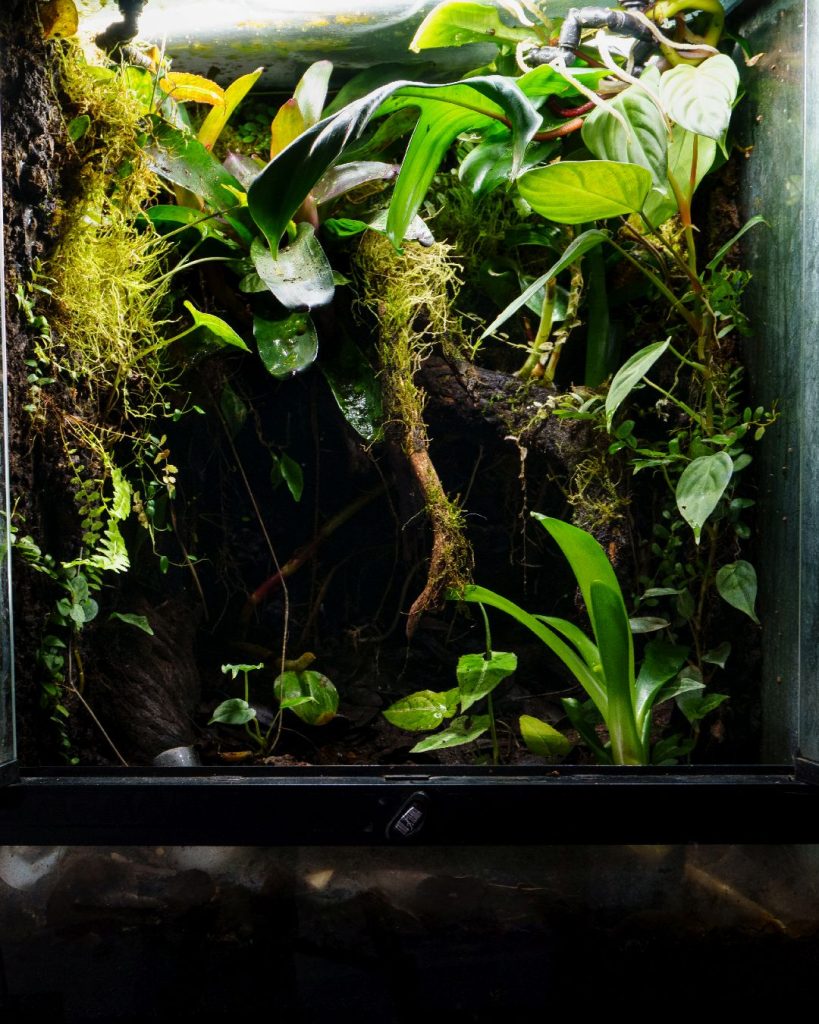
With a species in mind I went to work picking out some plants for this upcoming chapter in this Exo-Terra’s journey. Selecting plants has always been one of the most difficult parts of setting up a vivarium. There is usually a desire to heavily plant these cramped glass boxes with a variety of different plants. In my experience this usually just turns into a chaotic environment. Although the frogs might not mind the chaos, it becomes more of an eyesore than a well thought out scaped vivarium. I am by no means a pro when it comes to scaping, planting, and maintaining vivariums, but I have definitely learned my fair share through previous builds, failures, and experiments.
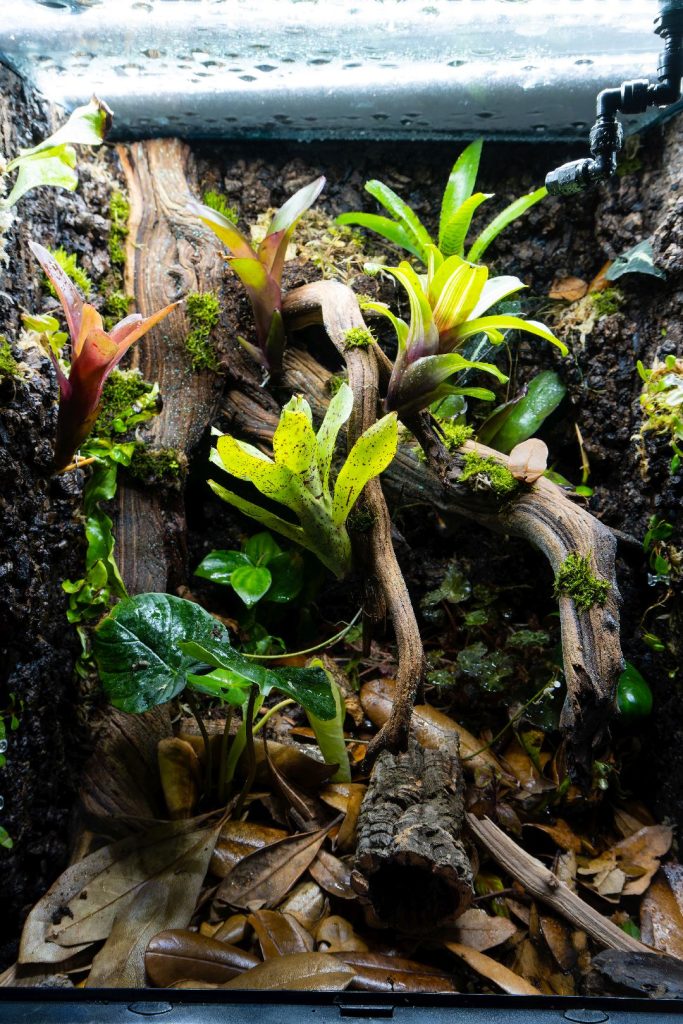
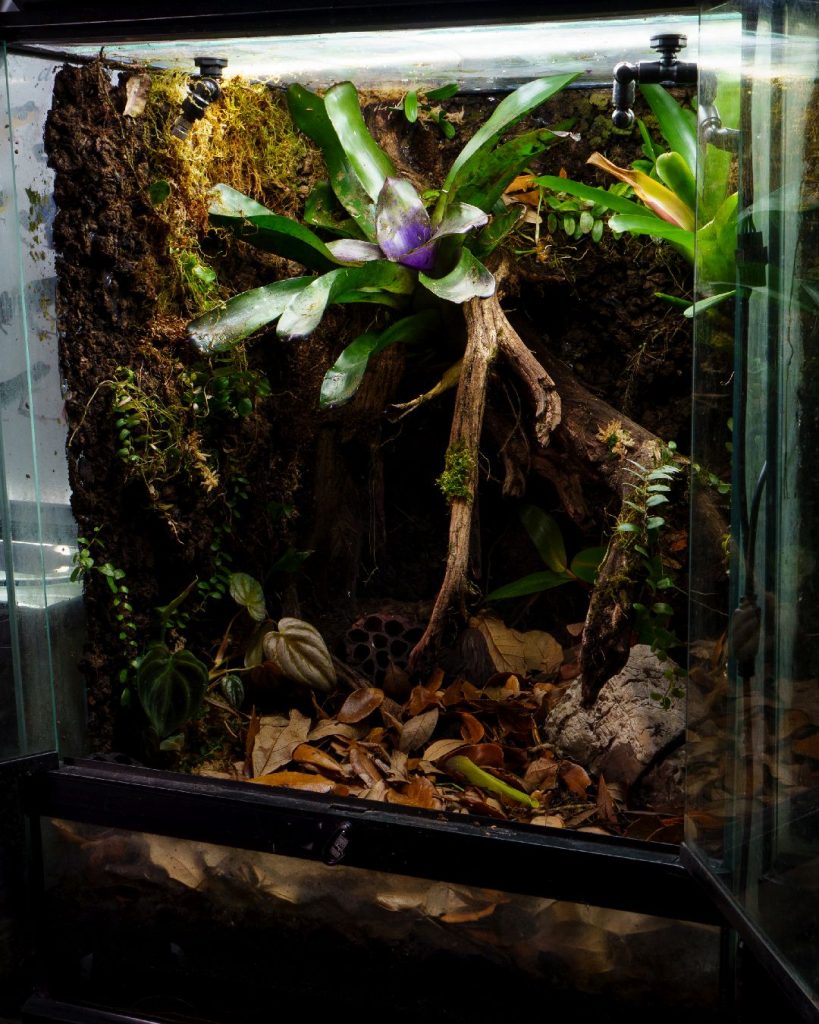
Taking into consideration my learnings, I decided to select only a few slower growing philodendrons. P sordiroi ‘small form’, P brandtianum, and P verrucosum ‘black’. Although the verrucosum may grow quicker, this variant has smaller leaves and is easier to manage. These three plants are also native to Colombia so it fit right in with its new residents. Finally, I finished off the vivarium with the introduction of neoregelia malibu. Accompanying these new plants were the established marcgravia rectiflora, and miscellaneous purple neoregelia that was given to me when I initially received the Sirensis.
Part 4. Introducing the new frogs
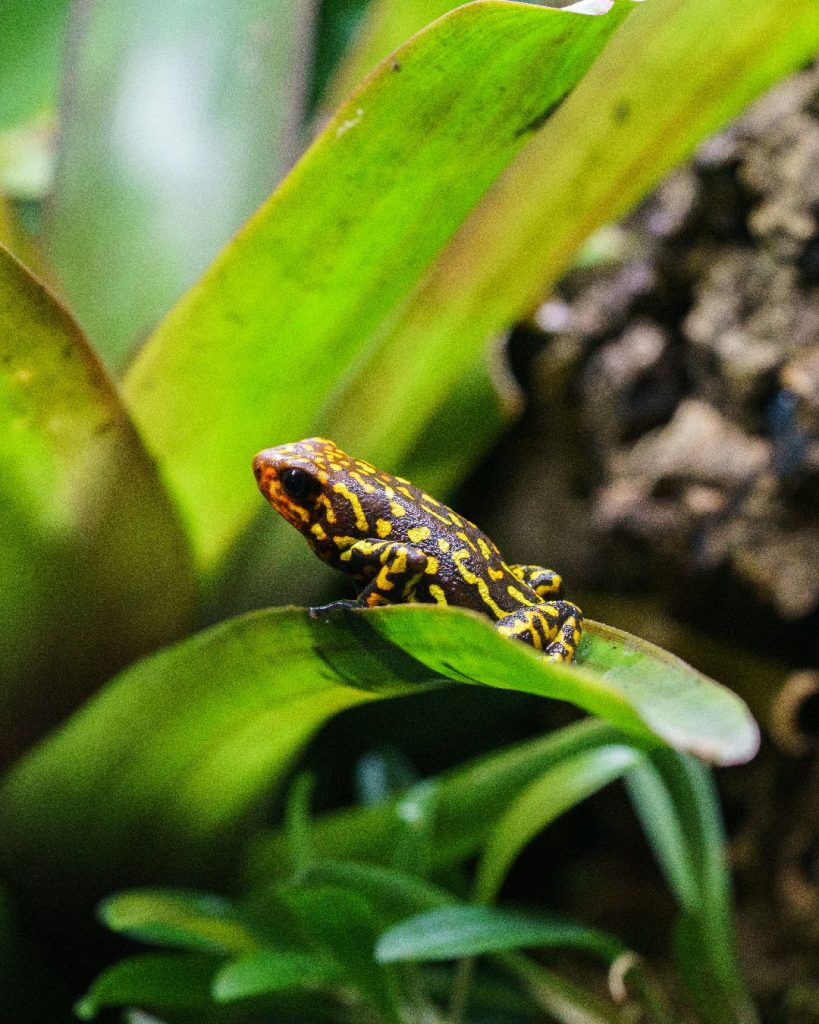
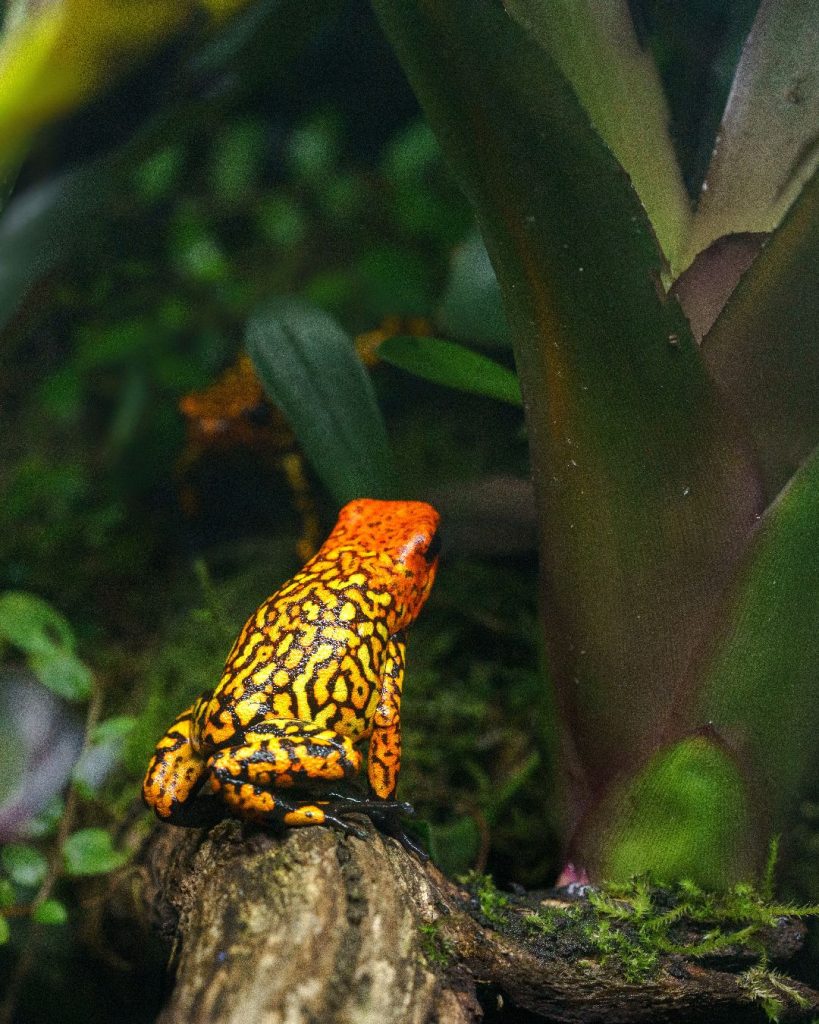
In preparation for this new vivarium I sought out some SFRHs. I ended up getting 2 froglets from Jake’s Jungle (TDC) and 4 from another local hobbyist (Nahn line). With my luck I ended up with 5 males and one frog which I haven’t been able to sex. I ended up keeping the nicest two males and traded for a confirmed female. This whole process of sorting and sexing frogs took around 6 months of waiting. Finally, I had a confirmed pair ready to move into their newly refreshed vivarium.
To my surprise the male immediately started calling to the visibly round female. The two hit it off right away and began courting. As of now she has been tending to several tads in both variants of bromeliad and has laid eggs pretty much at every site in the vivarium. Its now November and the froglets are almost out of water!
This is where the journal entries stop for now, I will definitely be adding updates as froglets make their way on land!
To learn about what I use as a substrate in all of my recent vivariums check out this article: Substrate Series: Filter Foam as a Vivarium Substrate – Monmouthfrogs